
Ever had that sinking feeling when you spot a water stain creeping across your ceiling? Or worse, hear that dreaded drip…drip…drip during a heavy rain? Often, the unseen culprit behind these homeowner nightmares isn’t a failing roof itself, but something much smaller, yet critically important: the chimney flashing.
When chimney flashing is damaged, old, or just plain installed wrong, it’s like leaving a welcome mat out for water damage. We’re talking about potential leaks, costly repairs, and a whole lot of stress – especially as we head into the colder months. Getting your chimney flashing solid and sealed is one of the most important, proactive things a homeowner can do. It plays a key role in maintaining a waterproof seal, protecting your home, and providing shelter for your family.
Here at Kelbie Roofing, we’ve seen firsthand what happens when chimney flashing is neglected. We’re roofing and chimney repair experts, and our mission is simple: keep your home dry and your investment safe. Let’s dive into what you need to know to protect your home.
What is Chimney Flashing, Anyway?
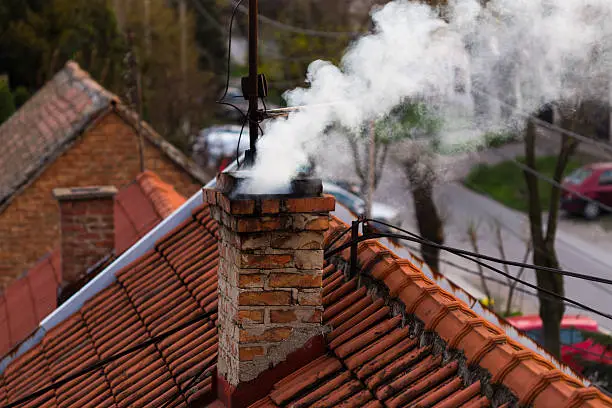
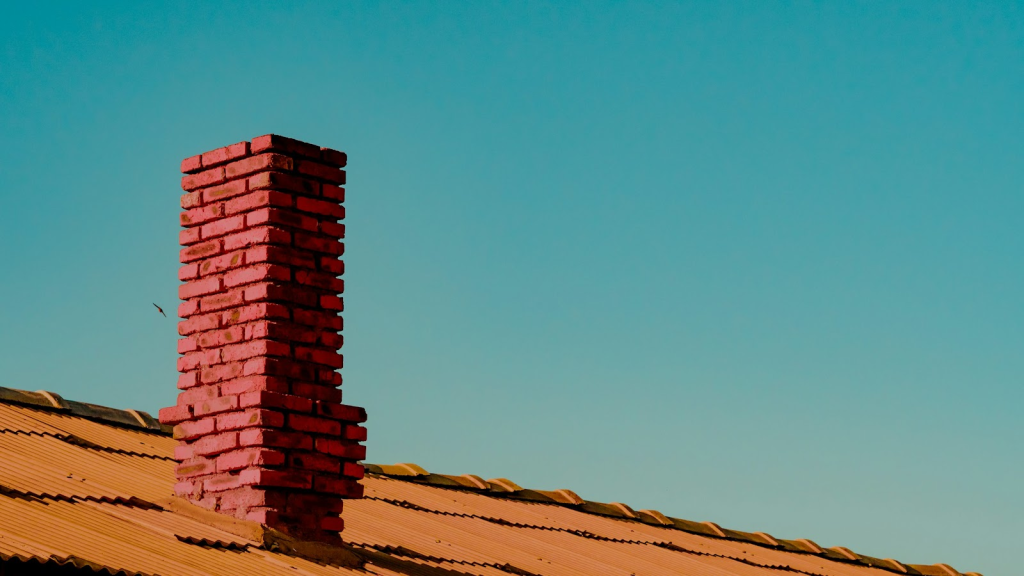
Think of chimney flashing as the waterproof armor where your chimney meets your roof. It’s not one big piece, but rather a cleverly designed system of metal pieces that work together to keep water from sneaking in at this vulnerable junction. Its main job is to create a tight seal, no matter what type of roof you have – asphalt shingles, tile, metal, you name it.
We often see flashing made from sheet metal, and copper is a top choice because it’s super durable and lasts for ages. But you’ll also find flashing made from aluminum or galvanized steel. Regardless of the specific metal, it’s usually paired with some high-quality caulk or roofing cement to make sure everything’s extra watertight.
Let’s break down the key parts of this “armor”:
- Base flashing: This is the foundation, sitting right at the base of the chimney, where it comes through your roof.
- Step flashing: Imagine a staircase climbing up the side of the chimney. That’s essentially what step flashing does. It’s made of individual pieces of metal that are interwoven with your roofing shingles, layer by layer, to prevent water from running down the sides of the chimney and under the shingles.
- Cap flashing (aka Counterflashing): This acts like a protective cap, covering the top edges of the base and step flashing. It’s often tucked into the chimney’s mortar joints for a secure, weatherproof fit.
- Chimney saddle (cricket): Do you have a steep roof? You most likely have a chimney saddle, too. The saddle will be located at the back of the chimney, used to divert water around the chimney, similar to a boat splitting the water of a lake.
Basically, it is all about strategic layering and sealing to ensure that rain and melting snow get directed away from your chimney, not into your home. A properly flashed chimney is a happy (and dry!) chimney.
Recognizing the Signs of Flashing Problems
Knowing what to look for, both inside and outside your home, can save you a lot of headaches (and money!) down the road. Think of yourself as a detective, on the lookout for clues that your chimney flashing might be failing.
Outside Your Home
- Take a good look at the metal itself: Are you seeing any rust, cracks, or corrosion on the old flashing? Any sign that the sheet metal is looking bent, warped, or generally worse for wear is a red flag. Remember, the flashing is your first line of defense against the elements, so its condition is crucial. Even small imperfections can allow water to penetrate.
- Check the seams: Look closely where the flashing meets the side of the chimney and the roofing. Are there any gaps, even small ones? Is the flashing pulling away from either the chimney or the roof? These gaps are like open invitations for water to seep in. The sealant (caulk or roofing cement) might have deteriorated over time, leaving the area vulnerable.
- Mortar matters: The cap flashing (or counterflashing) is usually tucked securely into the chimney’s mortar joints. Is that mortar crumbling, cracked, or missing in places? If the mortar is compromised, the cap flashing can become loose, creating an entry point for water. Think of the mortar as the “glue” holding the flashing in place.
- Shingle situation: Examine the roofing shingles around the base of the chimney, and up along the sides where the step flashing is installed. Are any shingles loose, damaged, curled, or missing altogether? This could indicate that water has been getting underneath, potentially damaging the roof deck and compromising the flashing’s effectiveness. The shingles and flashing work together, so problems with one often affect the other.
- The back, corners, and the front: While leaks can technically occur anywhere along the flashing, they tend to be most common at the corners of the chimney, the front, and at the back of the chimney. Pay extra close attention to these vulnerable areas. Gravity and the flow of water make these points particularly susceptible to leaks if the flashing isn’t perfectly sealed.
Inside Your Home
- Ceiling stains: Those telltale yellowish-brown water stains on your ceiling near the chimney? Don’t ignore them! That discoloration isn’t just an aesthetic issue; it’s a major warning sign that water is getting in. The stain might start small, but it will likely grow over time as the leak continues. Even if the stain seems to dry out between rains, the underlying problem hasn’t gone away. It could be along the wall, or on the ceiling itself.
- Attic alert: If you have access to your attic, make it a point to peek in there after a good rainstorm (be careful, of course!). Do you see any dampness on the insulation, wood, or other materials? Even if you don’t see standing water, a damp, musty smell is a strong indicator of moisture problems. That musty odor is often caused by mold and mildew, which thrive in damp environments and can cause further damage and health issues.
- Structural damage: Take a careful look at the structure of the chimney, and any other parts, inside your home. Check walls and ceilings. Are there any signs of water damage, like bubbling paint, warped wood, or soft spots in the drywall? These are serious signs that water has been infiltrating for a while, and the problem may be more extensive than you initially thought. Don’t underestimate the damage that even a small, persistent leak can cause over time.
The Obvious Giveaway
- Active leaks: And of course, if you’re actually seeing water dripping inside during or after rain – whether it’s a steady stream or just an occasional drip – you know you have a problem. This isn’t some minor issue; it’s a flashing red alert. Think of that drip as the tip of the iceberg. The leak itself is often the final, undeniable symptom of a much larger problem that’s been brewing, potentially for quite some time, unseen. Water might have been slowly infiltrating your roof and attic, weakening the structure, before it finally made its way to your ceiling or wall. Don’t just put a bucket under it and hope for the best. Address the root cause – the failing chimney flashing – immediately. The leak often starts on one of the corners, but it can come from any of the four sides, even from the back or the front.
Don’t ignore these warning signs! Even a small problem with your chimney flashing can quickly escalate into major water damage if left unaddressed. Early detection is key to preventing costly repairs.
The Chimney Flashing Installation Process: How Kelbie Roofing Does It
When it comes to chimney flashing, proper installation is everything. It’s not a simple slap-it-on-and-go kind of job. At Kelbie Roofing, we take a meticulous, step-by-step approach to ensure a long-lasting, waterproof seal. Here’s how we do it:
- Thorough assessment: First, our experienced technicians do a complete inspection. We look at your existing chimney flashing (if there is any), the type of roof you have, and even the slope of the roof. This helps us determine the best materials and methods for your specific situation.
- Careful removal: If there’s old flashing, we remove it very carefully. This might involve using tools like a hammer and pry bar, and sometimes even a circular saw to carefully cut through old mortar (without damaging the chimney, of course!).
- Prep work is key: We clean the chimney surface thoroughly and make sure the mortar joints are in good shape. We also check that the roofing deck itself is solid and ready for the new flashing.
- Base flashing first: We start by fitting and securing the base flashing to the front of the chimney and the roof deck. This forms the foundation of the whole system.
- Step flashing – The layered approach: This is where things get a bit intricate. We interweave individual pieces of step flashing with each course of shingles, going up the sides of the chimney. We make sure there’s plenty of overlap – usually several inches – to prevent any water from sneaking in. Each piece is securely fastened to both the roofing deck and the chimney.
- Cap flashing (counterflashing) – The protective cover: We carefully cut and shape the piece of cap flashing. Sometimes, this requires a trip to a sheet metal shop for custom fabrication. Then, we embed it securely into the chimney’s mortar joints (at least an inch deep!) and seal it with either high-grade polyurethane caulk or mortar, creating a solid barrier.
- Chimney saddle installation: For those steeper roofs, a chimney saddle, often times called a cricket, is a must. We build it, then install the edges below the roofing shingles.
- The waterproofing seal: Throughout the entire process, we use top-quality sealants (like polyurethane caulk or roofing cement) at every crucial junction. This creates a complete, watertight seal that keeps water out.
- Clean up: We remove all scraps from the job site, leaving nothing behind.
It’s a detailed process, but getting it right is crucial for preventing leaks and protecting your home. We don’t cut corners, and we stand behind our work.
DIY vs. Professional Installation: Know Your Limits
We all love a good DIY project, and saving some money is always tempting. But when it comes to chimney flashing, this is one area where calling in the professionals, like Kelbie Roofing, is usually the smartest move. Here’s why:
The Risks of Going DIY
Chimney flashing installation isn’t as straightforward as it might seem. It involves precise measurements, careful cutting of metal, working at heights (which is inherently dangerous), and a deep understanding of how roofing systems work. Small mistakes can lead to big leaks, and you might even end up voiding your roof’s warranty if you do it incorrectly. Plus, you’d need specialized tools that most homeowners don’t have lying around.
Why Professional Installation (Especially with Kelbie Roofing) Makes Sense
- Experience matters: Our team at Kelbie Roofing has years of experience dealing with all types of roofs and chimneys. We’ve seen it all, and we know how to get the job done right the first time.
- The right tools for the job: We have the specialized tools and equipment needed for a proper, safe, and efficient installation.
- We stand behind our work: We provide a warranty on our workmanship, giving you peace of mind knowing that your investment is protected.
- Preventing future headaches: A professionally installed flashing system is far less likely to leak, saving you from potentially costly repairs down the line.
Ultimately, it’s about protecting your home and your wallet. While a DIY attempt might seem cheaper upfront, the potential for errors and future problems often makes it a much more expensive option in the long run. It is not worth the risk.
Maintaining Your Chimney Flashing: Keeping Things Watertight
Once your chimney flashing is properly installed, a little bit of ongoing maintenance can go a long way in extending its lifespan and preventing future problems. Think of it like regular check-ups for your home’s health.
Here’s what we recommend:
- Regular eyeball inspections: At least twice a year (spring and fall are good times), take a look at your chimney flashing. You don’t need to be a roofing expert – just look for anything that seems out of place: obvious rust, cracks, gaps, or loose shingles around the chimney. And, of course, check after any major storms.
- Address small issues quickly: If you spot a tiny crack or a bit of caulk that’s starting to peel, don’t ignore it! These small problems can often be easily fixed with a bit more caulk, preventing them from becoming bigger, more expensive issues.
- Call in the pros (like us!) periodically: Even if everything looks good to your eye, it’s a smart idea to have Kelbie Roofing do a professional inspection every few years. We can spot potential problems that you might miss, and we can perform any necessary maintenance to keep your flashing in top condition. This includes things like re-caulking, touching up mortar, or replacing any worn components.
Think of it as preventative medicine for your roof. A little bit of attention now can save you from major headaches (and water damage!) later.
Protecting Your Home, One Flashing at a Time
So, there you have it. Chimney flashing might not be the most glamorous part of your home, but it’s absolutely crucial for keeping things dry and preventing potentially serious water damage. Proper installation and regular maintenance are key – and that’s where Kelbie Roofing comes in.
We’ve walked you through what chimney flashing is, how to spot problems, the importance of professional installation, and how to keep it in good shape. Now, it’s up to you to take action!
Don’t wait for a leak to spring before you think about your chimney flashing. Be proactive, protect your investment, and ensure the long-term health of your home.
Ready for peace of mind? Contact Kelbie Roofing today for a free chimney flashing inspection and estimate! We’re here to help you keep your home safe and dry, year-round. You can reach us or visit our website at [Website Address]. Don’t delay – a dry home is a happy home!
We’re committed to quality workmanship and making sure our customers are completely satisfied. Let Kelbie Roofing be your trusted partner in protecting your home from the elements.